
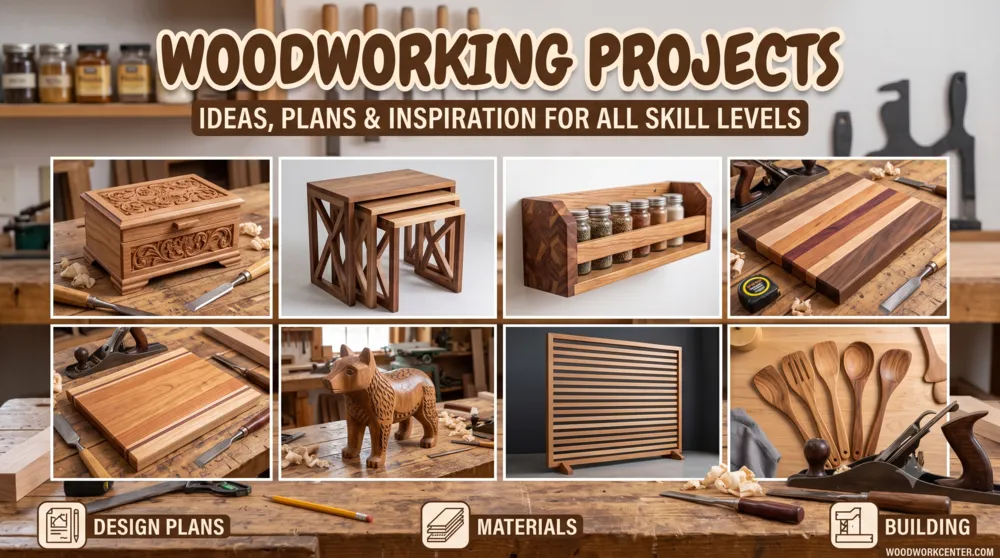
Woodworking projects are the best way to turn basic tool knowledge into practical skill. The right project teaches you how to measure accurately, make repeatable cuts, choose suitable joinery, assemble parts square, and apply a durable finish. The wrong project can leave you frustrated, with wasted lumber and a half-finished build.
This guide helps you choose a realistic project for your experience, tools, budget, and available workspace. It includes beginner, intermediate, and advanced ideas, plus practical guidance on materials, safety, planning, and skill progression.
Quick woodworking project selector
| Project | Level | Typical time | Main skills | Suggested material |
|---|---|---|---|---|
| Small shelf | Beginner | 2–4 hours | Measuring, straight cuts, drilling | Pine or plywood |
| Tool tote | Beginner | 3–5 hours | Layout, assembly, sanding | Pine or poplar |
| French cleat storage | Beginner | 1 weekend | Angle cuts, wall mounting, repetition | Plywood |
| Side table | Intermediate | 1–2 weekends | Joinery, squaring, finishing | Oak, maple, or poplar |
| Bookcase | Intermediate | 2 weekends | Dados, carcass assembly, edge treatment | Cabinet-grade plywood |
| Coffee table with drawer | Advanced | Several weekends | Furniture joinery, drawer fitting, wood movement | Hardwood |
Beginner woodworking projects
A good beginner project should be useful, forgiving, and small enough to finish. It should teach one or two new skills without requiring a workshop full of machines. Start with inexpensive material and concentrate on accuracy rather than speed.
1. Wall-mounted shelf
A simple shelf teaches accurate measuring, square cuts, drilling, sanding, and wall mounting. Use pine for an affordable painted shelf or plywood with edge banding for a cleaner modern appearance. Before mounting it, identify the wall construction and choose fixings rated for the expected load.
- Useful tools: circular saw or handsaw, drill/driver, square, level, sander.
- Main lesson: a basic project still depends on accurate layout and safe installation.
2. Wooden tool tote
A tool tote is compact, portable, and ideal for practising butt joints or dowel joints. The handle introduces careful drilling and alignment. Build the first version from pine or poplar, then repeat it in hardwood once you are comfortable with the dimensions.
- Useful tools: saw, drill, clamps, combination square, sandpaper.
- Main lesson: keeping two end panels identical and the box square during glue-up.
3. French cleat tool wall
A French cleat system is one of the most useful shop projects. It teaches repeatable angled cuts and lets you make custom holders as your tool collection grows. Use straight plywood strips and secure the wall cleats into studs or another suitable structure.
- Useful tools: circular saw or table saw, drill/driver, level, stud finder.
- Main lesson: repeatability, safe wall fixing, and modular design.
4. Small step stool
A step stool introduces load-bearing construction. Keep the design wide enough to resist tipping, use reliable joints, soften exposed edges, and test it carefully before use. A stool should not be treated as a casual scrap-wood build: structural safety matters.
- Useful tools: saw, drill, clamps, square, router or sanding block for edges.
- Main lesson: strength, stability, and the difference between decorative and structural work.
Browse more ideas in Beginner Woodworking Projects.
Intermediate woodworking projects
Intermediate projects introduce more demanding joinery, larger assemblies, and better control of wood movement. By this stage, you should be able to mill or select straight stock, work from a cut list, check diagonals during assembly, and prepare test pieces before applying a finish.
5. Side table
A small table is an excellent introduction to furniture construction. It can be built with dowels, loose tenons, traditional mortise-and-tenon joints, or carefully reinforced pocket-hole joinery. Focus on keeping the legs aligned and the base square before attaching the top.
6. Plywood bookcase
A bookcase teaches carcass construction, shelf spacing, edge treatment, and anti-racking methods. Dados can locate fixed shelves, while a properly attached back panel helps keep the case square. Tall furniture should always be anchored appropriately to reduce the risk of tipping.
7. Prayer kneeler
A kneeler combines furniture layout with ergonomic decisions. Height, knee support, stability, and smooth edges all matter. If this type of project interests you, see the existing prayer kneeler woodworking plans guide.
8. Makeup vanity
A vanity brings together a top, storage, hardware, and often a mirror support. It is a practical bridge between simple tables and more complicated cabinet work. Explore the makeup vanity woodworking plans for further ideas.
9. Mid-century modern furniture
Tapered legs, clean lines, and carefully controlled proportions make mid-century pieces visually simple but technically demanding. Make a full-size drawing or template before cutting angles. The guide to mid-century modern furniture plans is a useful starting point.
See the complete Intermediate Woodworking Projects collection.
Advanced woodworking projects
Advanced projects combine precise joinery, complex geometry, demanding finishes, or structural responsibility. Build prototypes and test joints before committing expensive material. When a project affects personal safety or a building structure, use qualified plans and comply with applicable codes.
10. Cabinet with fitted doors and drawers
A cabinet requires accurate carcass construction, consistent reveals, careful hardware installation, and a finish that can withstand regular handling. Build the case square before fitting doors or drawers; small errors multiply quickly.
11. Secret-compartment furniture
Hidden compartments require careful sequencing because mechanisms and cavities must be planned before final assembly. A prototype in inexpensive plywood can reveal clearance and alignment problems. For inspiration, visit the secret compartment woodworking plans.
12. Curved or laminated furniture
Bent laminations, shaped components, and sculpted seating introduce templates, forms, grain selection, and controlled glue-ups. These projects demand patience and consistent clamping pressure. Test the bending radius and spring-back with offcuts first.
Explore additional Advanced Woodworking Projects and the Woodworking Project Plans archive.

How to choose the right project
Choose a project by answering five questions before buying material:
- What will the finished piece need to do? Consider load, moisture exposure, wear, and who will use it.
- Can you complete every operation safely? Avoid designs that require unfamiliar cuts on small or unstable parts.
- Do you have enough space? Include room for breaking down sheet goods, assembly, clamping, and finishing.
- Can your tools achieve the required accuracy? Adapt the design or use an alternative joint when appropriate.
- Is the project small enough to finish? Completing a modest project teaches more than abandoning an ambitious one.
Planning before the first cut
A short planning process prevents expensive mistakes:
- Make a dimensioned sketch.
- Prepare a parts list and cutting list.
- Choose the joinery for each connection.
- Mark the visible faces and grain direction.
- Plan the safest order of operations.
- Dry-fit the parts before applying glue.
- Test the finish on an offcut from the same board.
For digital planning, compare the available approaches in our guides to free woodworking design apps and using Fusion 360 for woodworking.
Choosing wood and sheet material
Softwood
Pine, spruce, and fir are affordable and easy to cut. They work well for shop furniture, prototypes, painted pieces, and many beginner projects. They dent more easily than common furniture hardwoods and may contain knots or resin.
Hardwood
Oak, maple, walnut, cherry, beech, and ash are popular for durable furniture. Each species behaves differently during machining and finishing. Allow for seasonal movement when using wide solid-wood panels.
Plywood and other panels
Quality plywood is stable and efficient for cabinets, shelving, jigs, and painted furniture. MDF provides a smooth painted surface but produces very fine dust and requires suitable extraction and respiratory protection. Choose fasteners and edge treatments appropriate to the panel.
Learn more in Wood Types and Materials and the guide to wood moisture for woodworking.
Essential tools for woodworking projects
You do not need every machine at once. A practical starter set includes:
- tape measure, combination square, marking knife or pencil;
- circular saw with a straightedge or a suitable handsaw;
- drill/driver and drill bits;
- random-orbit sander or sanding block;
- chisels and a mallet;
- several clamps in useful sizes;
- eye, hearing, and respiratory protection appropriate to the operation.
As projects become more complex, a router, table saw or track saw, planer, bandsaw, drill press, and dust extractor may improve accuracy and efficiency. Buy tools to solve a recurring need rather than to fill a workshop. See Woodworking Tools and Equipment for a broader overview.
Woodworking safety essentials
Read and follow the instructions supplied with every tool. Wear eye protection, control dust, protect your hearing, secure loose clothing and long hair, and keep hands away from cutting paths. Use guards, push devices, hold-downs, and jigs as intended. Disconnect power before changing blades, bits, or making adjustments.
Wood dust can present serious respiratory and long-term health risks. Use effective extraction at the source and suitable respiratory protection, particularly when machining MDF, treated material, or sensitizing species. Provide appropriate ventilation when using finishes and keep ignition sources away from flammable vapors.
Important: project ideas on this site are educational. For structural, load-bearing, electrical, children’s, or safety-critical builds, use professionally reviewed plans and follow applicable codes and manufacturer requirements.

Frequently asked questions
What is the best first woodworking project?
A small shelf, tool tote, or simple shop-storage project is a strong first choice. Each can be completed with a limited tool set while teaching measuring, square cuts, drilling, sanding, and assembly.
What woodworking projects can be made with basic tools?
Shelves, planter boxes, tool totes, simple benches, picture frames, and storage racks can all be adapted for a circular saw or handsaw, drill/driver, square, clamps, and sanding tools.
Should a beginner use hardwood or softwood?
Affordable softwood such as pine is often easier for early practice, although knots and dents require care. Poplar is a useful step toward hardwood furniture because it machines well and is commonly used for painted projects.
How do I prevent a woodworking project from going out of square?
Start with straight, accurately cut parts. Assemble on a flat surface, use clamping blocks where needed, and compare the two diagonal measurements before the glue sets. A properly fitted back panel can help square a cabinet or bookcase.
How should I progress to harder projects?
Choose each new project to add one major skill: first accurate cutting, then reliable assembly, then a new joint, moving parts such as drawers, solid-wood movement, and finally complex shapes or advanced finishes. Repeating a project is also valuable because it develops consistency.