Woodworking joints are essential components in creating strong and durable woodwork projects. Knowing how to do woodworking joints is crucial for ensuring the structural integrity and longevity of your creations. By understanding the different types of joints and the tools needed to create them, you can achieve professional results in your woodworking endeavors.
Different types of woodworking joints serve specific purposes, from simple butt joints to more complex dovetail joints. Each type offers its own advantages in terms of strength, aesthetics, and functionality. Whether you are a beginner or an experienced woodworker, mastering various joint techniques will enhance the quality of your projects and elevate your craftsmanship.
In this comprehensive guide, we will delve into the world of woodworking joints, exploring the different types available, the tools required for creating them, step-by-step instructions on how to make basic and advanced joints, valuable tips for achieving precision, as well as common mistakes to avoid. By following these guidelines, you can elevate your woodworking skills and produce high-quality pieces that stand the test of time.
Types of Woodworking Joints
Woodworking joints play a crucial role in the strength and durability of woodwork projects. Different types of woodworking joints serve various purposes, from simple butt joints to intricate dovetail joints. Each type of joint has its own unique characteristics and benefits, contributing to the overall quality of the finished piece. Understanding the different types of woodworking joints is essential for any woodworker looking to create high-quality and long-lasting projects.
Butt joints are one of the simplest types of woodworking joints, where two pieces of wood are joined together at their ends. While butt joints are easy to create, they may not be as strong as other types of joints due to their minimal surface area for gluing.
Dado joints, on the other hand, involve cutting a slot or channel into one piece of wood to fit another piece snugly into it. This type of joint is commonly used in cabinet making and shelving.
Dovetail joints are known for their strength and durability, making them popular choices for drawers and boxes. The interlocking teeth-like projections on each side make dovetail joints resistant to pulling or twisting forces. Other common types of woodworking joints include mortise and tenon joints, lap joints, and mitered joints. Each type has its own set of advantages and challenges, offering woodworkers a wide range of options depending on their project requirements.
| Types | Characteristics |
|---|---|
| Butt Joints | Simple to create but may lack strength due to minimal surface area for gluing |
| Dado Joints | Involve cutting slots or channels for a snug fit between two pieces; commonly used in cabinet making |
| Dovetail Joints | Known for strength and durability with interlocking teeth-like projections; popular in drawers and boxes |
Tools Needed for Woodworking Joints
Woodworking joints are crucial elements in creating strong and durable woodwork projects. To efficiently achieve this, having the right tools is essential. Here we will discuss the essential tools needed for making woodworking joints: a chisel, saw, router, and clamps.
Chisel
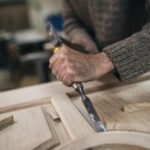
A chisel is a hand tool with a sharp blade on its end used to carve and shape wood. It is fundamental in creating precise cuts and clean edges when working on woodworking joints. Different types and sizes of chisels are available, each serving a specific purpose in joinery work.
Saw
A saw is another indispensable tool for making woodworking joints. From hand saws to power saws like a table saw or circular saw, there are various options to choose from based on the type of joint you are creating. A saw helps in cutting wood accurately to fit the joint together seamlessly.
Router
A router is a power tool that aids in hollowing out areas of wood to create joints like dado joints or rabbet joints. It allows for precision cutting and shaping of wood that would be challenging to achieve with other tools. Routers come with different bits for various joint styles.
Clamps
Clamps are vital for holding pieces of wood together securely while the glue dries during the assembly of woodworking joints. They help in ensuring that the joint remains tight and strong once complete. Different types of clamps such as bar clamps, spring clamps, or pipe clamps can be used based on the size and shape of the project.
Having these essential tools for woodworking joints will not only make your joinery work more manageable but also enhance the quality and strength of your finished woodwork projects.
Preparation
Woodworking joints are essential in creating strong and durable woodwork projects. Before diving into the different types of joints and techniques, it is crucial to emphasize the importance of preparation. One of the key aspects of preparation is ensuring that the wood is accurately measured, marked, and cut before attempting to create any joints. This step sets the foundation for successful woodworking joints and contributes significantly to the overall quality of the finished piece.
To prepare wood for joinery work, start by measuring and marking the areas where the joints will be placed. Use a reliable measuring tool, such as a tape measure or combination square, to ensure precise measurements. Marking the wood with a pencil or marking gauge helps indicate where cuts should be made for each joint. Taking your time with this step and double-checking measurements can save you from costly mistakes down the line.
Once the wood is accurately measured and marked, proceed with cutting it according to your plans. Whether using a hand saw, table saw, or miter saw, make sure to follow your markings closely to achieve clean and accurate cuts. Take care to maintain straight lines and angles as per your design specifications. Remember, accurate cutting is crucial for successful woodworking joints as even slight deviations can affect the overall fit and strength of the joint.
| Importance | Actions |
|---|---|
| Accurate Measurement | Use tape measure or combination square |
| Precision Cutting | Utilize hand saw or miter saw |
Step-by-Step Guide on How to Make Basic Woodworking Joints
Woodworking joints are essential in creating strong and durable woodwork projects. Among the basic woodworking joints are butt joints and miter joints. Here is a step-by-step guide on how to make these common woodworking joints:
Butt Joints:
- Measure and mark the pieces of wood that will be joined together.
- Cut the wood pieces to the desired length using a saw.
- Apply glue to one of the surfaces that will be joined together.
- Align the pieces of wood and clamp them together until the glue dries.
- Sand down any rough edges for a smooth finish.
Miter Joints:
- Measure and mark the angle at which the two pieces of wood will be joined together.
- Cut each piece of wood at a half of this angle so that when joined, they form a perfect corner.
- Apply glue to both angled surfaces and join them together carefully.
- Use clamps to hold the pieces in place while the glue sets.
By following these steps, you can create basic woodworking joints like butt joints and miter joints with precision and accuracy. Remember to use sharp tools and take your time to ensure a strong bond between the wood pieces.
Advanced Woodworking Joints Techniques
When it comes to woodworking, mastering advanced joint techniques can take your projects to the next level in terms of both strength and aesthetics. Two popular and traditional joint types that are often used in fine woodworking are dovetail joints and mortise and tenon joints. These joints not only provide structural integrity but also add a touch of craftsmanship to your creations.
To successfully create dovetail joints, you will need precision and patience. Dovetail joints are known for their strength and attractive appearance due to their interlocking nature, resembling the shape of a dove’s tail. To make dovetail joints, follow these steps:
- Measure and mark the wood pieces accurately where the dovetails will be cut.
- Use a sharp chisel or dovetail saw to carefully remove material along the marked lines, creating angled tails on one piece of wood.
- Correspondingly mark and cut out matching pins on the other piece of wood that will fit into the tails snugly.
- Carefully fit the interlocking tails and pins together, ensuring a tight fit without gaps.
Mortise and tenon joints, on the other hand, consist of a protruding “tenon” from one piece fitting into a hollowed-out “mortise” in another piece. This joint type is versatile and commonly used in furniture making. Here’s how you can create mortise and tenon joints:
- Measure and mark where the mortise will be located on one piece and where a corresponding tenon will be on the mating piece.
- Use a chisel or router to carefully remove material within the marked area for the mortise.
- Cut out the tenon on the other piece using a saw or table saw with precise measurements for a snug fit inside the mortise.
- Dry-fit both pieces together to ensure they align correctly before applying glue for a permanent bond.
Mastering these advanced woodworking joint techniques may require practice, but once perfected, they can elevate your woodworking projects to professional levels. Remember that precision is key when creating intricate joint designs like dovetails and mortise-and-tenons – take your time, measure accurately, and enjoy the process of creating strong, beautiful connections in your woodwork.
Tips for Achieving Perfect Woodworking Joints
Woodworking joints are crucial for ensuring the strength and durability of woodwork projects. While mastering woodworking joints can be challenging, there are several tips and tricks that can help you achieve perfect results. Whether you are a beginner or an experienced woodworker, following these guidelines can significantly improve the quality of your joints.
Choose the Right Wood
Selecting the appropriate type of wood is essential for achieving perfect woodworking joints. Hardwoods like oak, maple, or cherry are ideal for creating strong and durable joints, while softwoods like pine may not provide the same level of stability. It is also important to consider the grain direction of the wood when creating joints, as working against the grain can result in weak and unreliable connections.
Use Sharp Tools
Sharp tools are a must-have when it comes to creating precise woodworking joints. Dull blades can tear or splinter the wood, leading to inaccurate cuts and ill-fitting joints. Ensure that your chisels, saws, and other cutting tools are properly sharpened before starting any joinery work. Regular maintenance of your tools will not only improve the quality of your joints but also make the work safer and more efficient.
Precision in Measurement and Marking
Accurate measurement and marking are key to achieving perfect woodworking joints. Take your time to measure each piece carefully before making any cuts or adjustments. Use marking gauges, squares, and other measuring tools to ensure that your cuts are precise and consistent. Double-checking your measurements before cutting will help prevent mistakes and ensure tight-fitting joints in your woodworking projects.
By following these tips and tricks, you can enhance your skills in creating woodworking joints with precision and accuracy. Remember that practice makes perfect, so don’t be discouraged by initial challenges. With patience, attention to detail, and a focus on improving your techniques, you can master the art of creating flawless woodworking joints for all your projects.
Common Mistakes to Avoid When Making Woodworking Joints
Woodworking joints play a crucial role in the strength and durability of woodwork projects. Mastering the art of creating precise and sturdy joints is essential for any woodworking enthusiast looking to elevate their craft.
In this guide on how to do woodworking joints, we have covered the importance of understanding different joint types, essential tools needed, preparation steps, basic joint-making techniques, advanced joint methods, tips for achieving perfection, and now we will discuss common mistakes to avoid when making woodworking joints.
One of the most common errors when creating woodworking joints is improper measurements. Accurate measuring is key to ensuring that the joints fit together seamlessly and securely. It is essential to take time to measure twice and cut once to prevent any inaccuracies that could compromise the quality of the joint. Using measuring tools like a combination square or tape measure can help in achieving precision in your woodworking projects.
Another mistake to avoid when making woodworking joints is using incorrect tools. Each type of joint requires specific tools such as chisels, saws, routers, and clamps for proper execution. Using the wrong tool can result in poorly fitting joints or damage to the wood material.
Investing in high-quality tools suited for woodworking tasks will not only make the process easier but also ensure better results. Additionally, having a well-maintained set of tools will contribute to a smoother workflow when creating woodworking joints.
Lastly, patience is key when it comes to making woodworking joints. Rushing through the process can lead to overlooked details or hasty cuts that diminish the overall quality of the joint.
Taking your time to carefully plan each step, execute it with precision, and make necessary adjustments along the way will ultimately result in well-crafted and strong woodworking joints. Remembering these common mistakes and how to avoid them will help you become more proficient in creating perfect woodworking joints for your projects.
Frequently Asked Questions
How Do You Join Wood Together for Beginners?
Joining wood together as a beginner can be done using basic methods such as butt joints, pocket hole joints, or even simple nail and glue techniques. These methods are relatively easy to learn and execute with the right tools and materials.
What Are the Basic Woodworking Joints?
Basic woodworking joints include popular options like butt joints, miter joints, lap joints, dado joints, and dovetail joints. Each of these joints serves different purposes and has its own unique characteristics in terms of strength, aesthetics, and ease of construction.
What Is the Easiest Joint to Make?
The easiest joint to make for beginners is typically the butt joint. This straightforward method involves joining two pieces of wood by simply butting them together at a right angle and securing them with nails, screws, or glue. While not the strongest joint option available, it is a good starting point for those new to woodworking.

Hi everyone! I’m a woodworker and blogger, and this is my woodworking blog. In my blog, I share tips and tricks for woodworkers of all skill levels, as well as project ideas that you can try yourself.


